How to add and manage Labels
Manage Labels to categorize and organize visitors, enabling efficient management.
For each visitor ticket you can add a colorful label with personalized information. Labels function like sticky notes and are visible for all coworkers in Qminder.
Labels show up in the Service View's left-hand waiting list and in each ticket's Visitor Details.
.png?width=393&height=499&name=labels+(1).png)
How your location and colleagues want to use labels is up to you. The labels are useful for marking down:
-
The language of your visitors.
-
Their reason of visit (what or who they want).
-
Their appearance, so you can approach them on the shop floor.
-
Whether they have shared required documents or info.
The language of your visitors.
Their reason of visit (what or who they want).
Their appearance, so you can approach them on the shop floor.
Whether they have shared required documents or info.
Labels are a simple-to-use, intuitive tool. If you are looking for a more data-driven approach, look into Custom Input fields.
You can add labels at several stages of the customer journey:
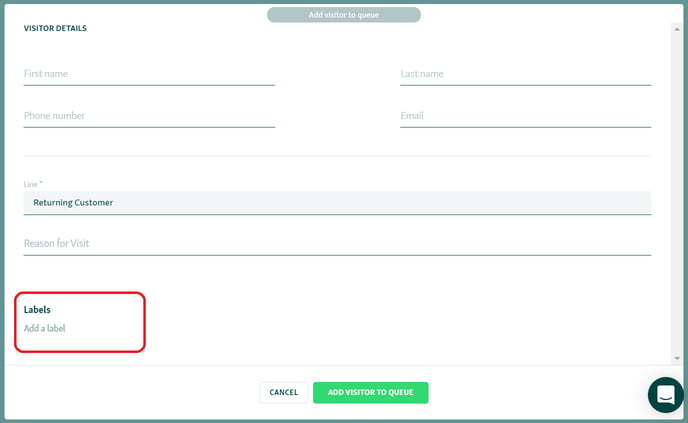
1. Sign In - You can add labels in the Visitor Details window during registration.

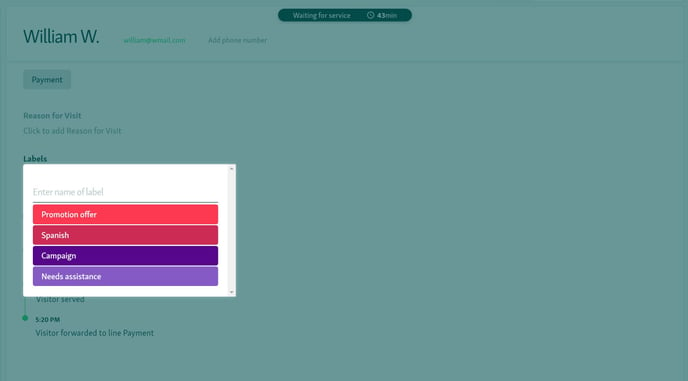
2. Waiting - Click on a visitor in the waiting list to open the Visitor Details. Add a label directly in this window.

3. Service - During service, you can add a label in the details of the visitor you're currently viewing.
NB! You can remove labels in the same window where you add them by clicking on them.
HOW TO EDIT THE LABELS LIST
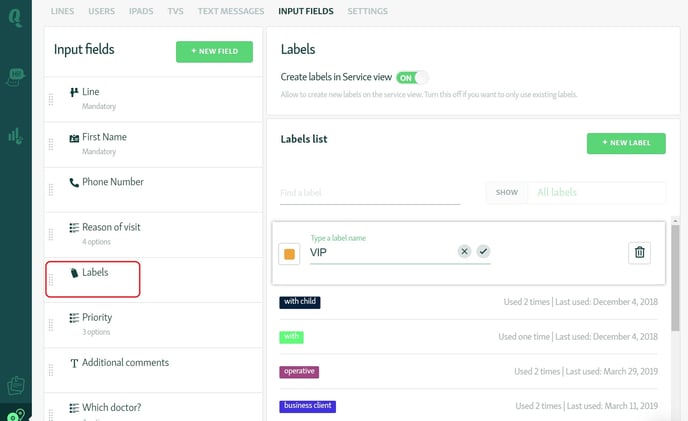
You can edit and delete labels from the labels list in the settings. Click on the Locations tab on the left hand sidebar and then click on the location which labels you wish to edit. Click on Input Fields and then click on Labels.

-
ADD NEW LABELS by clicking on +NEW LABEL.
-
SEARCH FOR LABELS by typing and filter them by clicking on All Labels.
-
LOCK THE LABELS LIST by turning off Create labels in Service view. This way you can decide if you want to let your clerks add new labels or do you want them to only use the labels that have been pre-created.
ADD NEW LABELS by clicking on +NEW LABEL.
SEARCH FOR LABELS by typing and filter them by clicking on All Labels.
LOCK THE LABELS LIST by turning off Create labels in Service view. This way you can decide if you want to let your clerks add new labels or do you want them to only use the labels that have been pre-created.
You can edit existing labels by clicking on them on the list.
-
CHANGE THE LABEL COLOR by clicking on the colored square in front of the label.
-
DELETE A LABEL by clicking on the trash can icon.
CHANGE THE LABEL COLOR by clicking on the colored square in front of the label.
DELETE A LABEL by clicking on the trash can icon.
HOW TO DISPLAY LABELS IN THE WAIT LIST
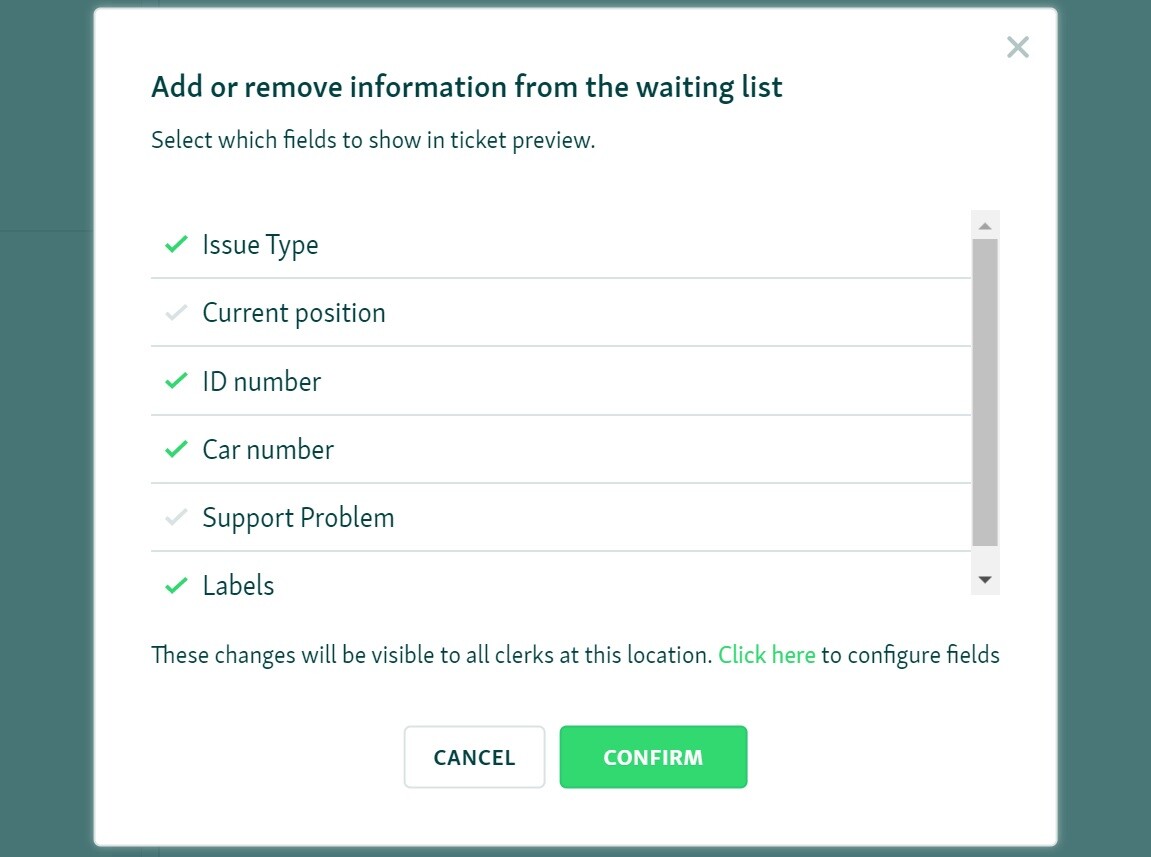
Location Manager users can choose to hide or display the labels from the left-hand wait list by clicking on the gear icon inside the SERVING NOW category box.

NB! Any change you make will affect all clerks at the current location.
