
You can create your very own iPad sign-in flow from Qminder's iPad settings. Logic steps allow you to create several sign-in flows that run in parallel and are tailored to different groups of visitors.
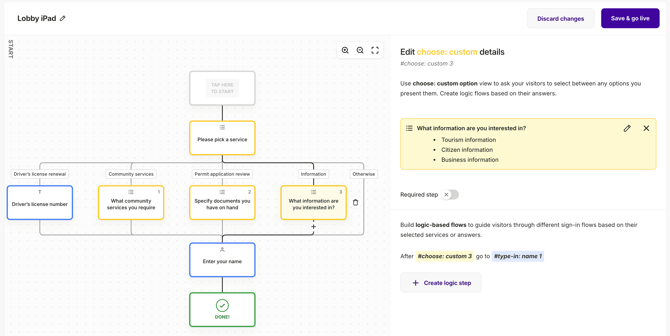
For general information about the sign-in flow, take a look a our article on ipad configuration.
To create a branched flow, start by going to the Locations tab of your Dashboard and then select the location on which iPad you wish to edit. Click on the IPADS tab at the top and select the iPad you wish to configure.
To branch out the sign-in flow and use logic steps effectively, you need to take three main steps:
-
Configure the service lines visitors can choose from
-
Create different options that constitute the branches following lines
-
Connect selected lines and options by adding logic steps
NB! This given example shows how to create a branching sign-in flow based on the chosen service line. Alternatively, branches can also be based on custom questions.
Configure lines for the iPad
The basis for the creation of logic steps is a set of lines to choose from.
(If you haven't added lines to Qminder yet, learn how to do that here.)
Click on the yellow field box saying "Please pick a service". On the right side of the screen, you will find the settings for lines.
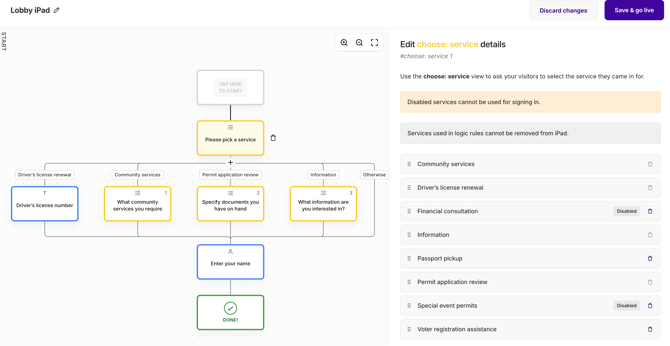
Scroll to the bottom of the panel on the right to the option: + CREATE LOGIC STEP and click on this button.
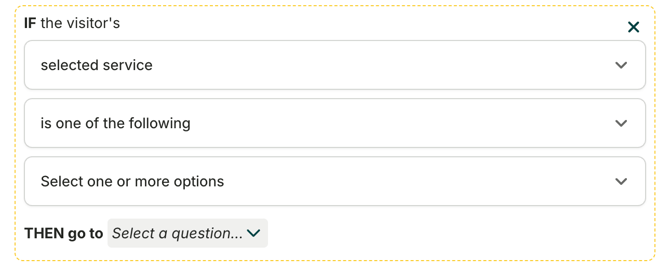
- selected service is one of the following
- selected service is none of the following
- select: one or more options from the service lines available for the iPad
- choose from previously created option
- create a new option under "+ADD"
Create several options
You can create fields according to what your visitors should be able to see during the sign-in.
You can add the following types of fields:
-
choose:custom - visitor selects custom information
-
type-in: custom - visitor enters custom information
-
type-in: name - visitor enters their name
-
type-in: phone - visitor enters phone number
-
type-in: email - visitor enters email address
-
review: text - display custom information for the visitor to read
You have the option to:
-
create a field in a random place on the flow then drag&drop it onto its place.
-
create a sequence of steps one by one.
If the branches don't appear in the right way, drag and drop the fields across the flow as needed.
If you need the branches to take a different form, edit the "THEN go to" option at the bottom of each "IF - THEN" window.
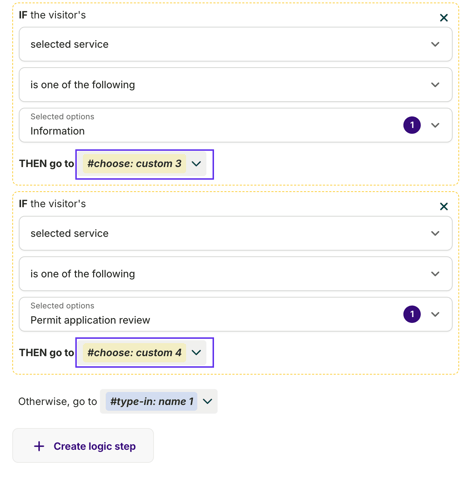
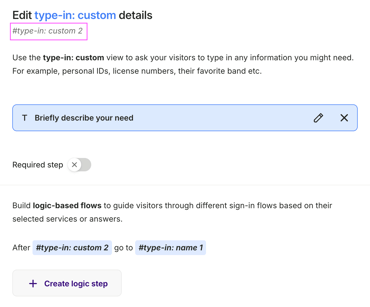
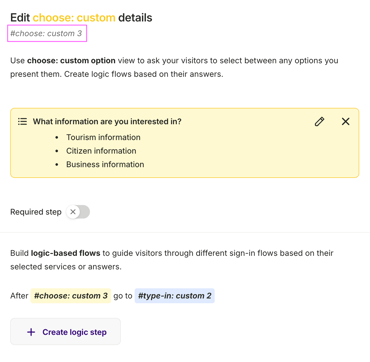
Tip: if you're not sure what to add in "THEN go to", find the name of a field at the top left after clicking on it, right under the "Edit ... details" title.
Create up to six branches per level in the flow.
Note that you can also create sub-branches using logic steps.
Still haven't found the perfect sign-in flow?
If you need advice how to set up your iPad flow, contact our Customer Success team! You can reach out via email or start a chat with us by clicking on the bubble icon at the bottom of this page.