What is Self check-in
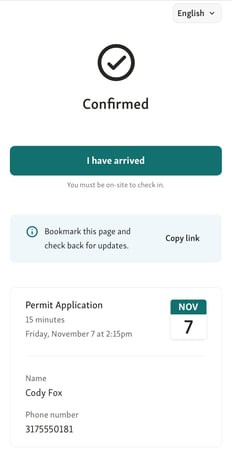
Self-check-in lets visitors confirm their arrival for scheduled appointments on their own, directly from the appointment confirmation page.
Learn more about the visitor experience with self-check-in for Appointments.
Once checked in, their appointment automatically updates to Checked in in both Calendar and Service View, so your team can easily see who’s arrived.
See what the visitor experience looks like in Self check-in for Appointments.
How to enable Self check-in
-
Go to Settings → Visitor Website → Appointments.
-
Turn ON the Self check-in toggle.

Turning this on unlocks an additional setting for Check-in window
Optional: Require on-site check-in (Geofencing)
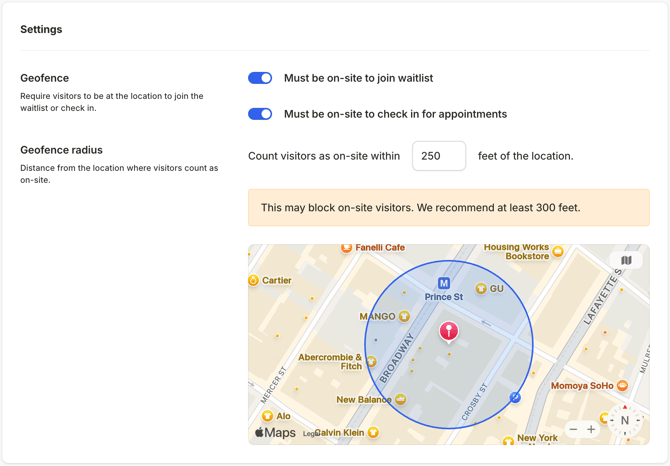
If you want visitors to check in only once they arrive at your location, enable Geofencing.
When active, visitors must be within a set distance of your location (200 m by default for non-US locations, 700 ft for US locations).
📖 Learn more in Geofencing.
Enable this by going to Location Settings → Visitor Website → Settings and turning on Must be on-site to check in for appointments. The radius can be adjusted under Geofence radius in the same section.
Set the check-in window
Define how early visitors can check in before their appointment:
-
Enter a whole number (starting from 1).
-
Choose between minutes or hours.
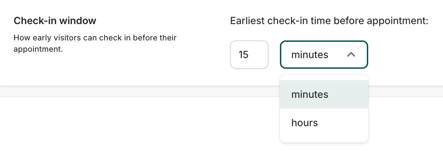
Example: 15 minutes before an appointment.
This ensures visitors can only check in shortly before their scheduled time.
Save your changes
Once you’ve enabled Self check-in and adjusted the options, your setup is complete.

Visitors will see the I have arrived button appear automatically on their appointment confirmation page when their check-in window opens.
💡 Good practice
Use your appointment reminder message to give visitors clear, pre-visit instructions and a direct appointment link for check-in. This helps if they didn’t bookmark the page, closed the tab, or booked their visit a long time ago.
