This article does not apply to input fields on the Sign-In iPad. To collect additional data on the iPad, see the article about Configuring input fields for iPad.
With custom Input fields, you can ask any information you need from your visitors during check-in and provide a better service with relevant information.
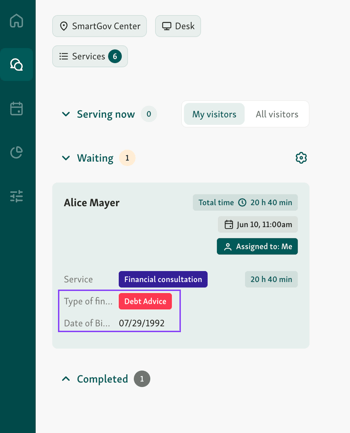
Custom input fields can be displayed in the Service View Waiting list area (if configured so by a manager) and in the Ticket Details.
Example: Service view
Example: Visitor ticket detail

NB! All of this data can then be exported into Excel from the Visitor History. This can be especially valuable for managers as it allows them to view and analyze all of the gathered data in Excel.
How to create custom Input fields?
1. Go to Location settings from the menu and locate to Input Fields & Labels page.
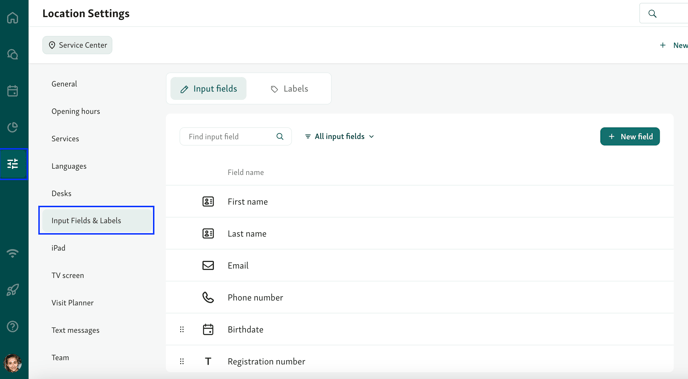
2. Click on + New field from the top right corner and choose the type of field you want to create.

You can add multiple types of input fields:
-
Email
- Phone number
- Date field
- Numeric field for no letters or symbols in replies
-
List with premade answers
-
Text field for open-ended questions such as; comments, reason for visit, additional information
-
Website link allows relevant links to be saved to a visitor.
An example hyperlink could be an internal CRM profile, added automatically via custom API integration.
Configuring Input fields
When adding a new field or clicking on an existing one, the settings page will let you modify the input fields.

For all types of custom Input fields, you need to add a title and configure the following settings;
- Title: This is the input field title that will be displayed across all available devices, reports, and pages.
- Visitor-facing title: Enable or disable this option to display a different title to the visitors on iPad, Visitor website, and Text messages.

- Services: Configure if the Input field should be only visible to specific Services. You can later select which Services from the drop-down menu.
- Remote sign-in
- Required: Enable one of these options if you want to set the Input field mandatory during sign-in or before finishing service. Otherwise, custom Input fields will be set to non-mandatory by default.

Additional options with LIST type input fields:
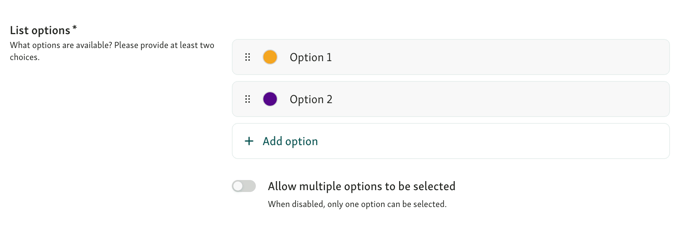
- By clicking +ADD LIST OPTION, you can add answer choices.
- By enabling Allow multiple options to be selected, clerks can select more than one option as the answer.
- Reorder input fields by clicking on the dotted icon in front of the option. Drag and drop it to move its order
You can edit existing select options by clicking on them:
-
RENAME the option by clicking on its name.
-
CHANGE COLOR by clicking on the square in front of the option.
-
DELETE the option by clicking on the trash can icon.
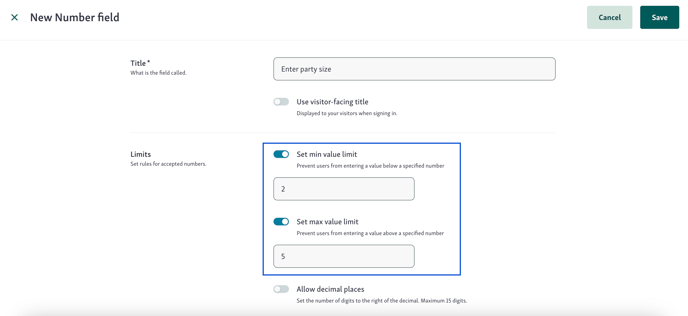
Additional options with NUMBER type input fields
-
Limits: You can configure the minimum and maximum values to set value limits. You can allow negative values as well.
-
Allow decimal places: If you need to collect numerical values that include decimal places, you need to allow this option. Set the number of digits the visitor can enter to the right of the decimal. For example, If you set the limit to 2 digits, visitors can't enter 1.211 as an answer.
NB!: Number zero doesn't count as a value on the right side of the decimal when decimal places are allowed.

Displaying Input fields in the Waiting list
Location Manager users can choose to hide or display specific input fields from the left-hand wait list by clicking on the gear icon inside the SERVING NOW category box.
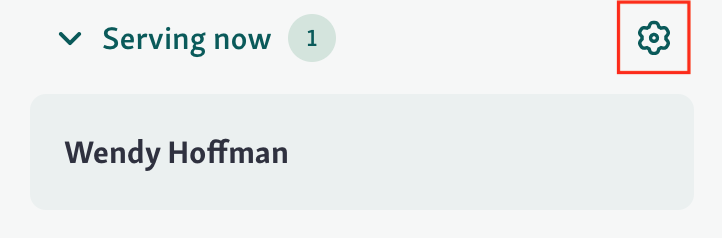
NB! Any change you make will affect all clerks at the current location.
