Excel export in Visitor History
The data around your location can easily be exported as Excel spreadsheet.
Here's how to manually export visitor data to Excel. If you wish to automate the process, check out our Google Sheets integration.
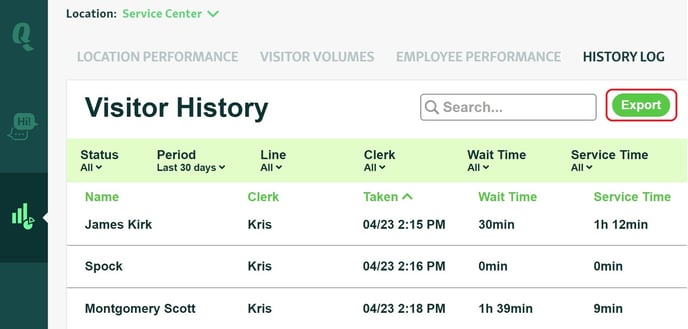
Go to the Data Insights tab from the sidebar and then navigate to the Visitor History tab.
Here, you should apply all the filters you need, or leave all of them as-is.
Press Export to assemble your Excel spreadsheet.

The Excel file will have the following sheets:
-
Ticket List
-
Clerks (conditional)
-
Lines
By setting up custom Input Fields, your clerks can fill in detailed information about your customers. This data can then be seen and exported on the Visitor History page. This can be especially valuable for managers as it allows them view and analyze all of that gathered data in Excel.
Note! Input Field data is only available in the old Export version. Please switch back to the old Visitor History view in order to see field data columns in the Excel export.
Ticket List
The ticket list sheet contains the raw ticket data of all the filtered tickets.
This includes the time the ticket was taken, as well as the time the ticket was called and marked served (where applicable).
There are also columns showing the status of the ticket, wait and service times (where applicable), the clerk who called the ticket, and the line where the ticket was taken.

In addition, there are also columns for all the fields asked during sign-in as well as all your custom input fields and labels.

Clerks
The clerks sheet contains a breakdown of the selected tickets by clerk and date.
Tickets marked as cancelled are not counted towards any clerk's numbers.
When there are only cancelled tickets, this sheet will not be created.

Lines
The lines sheet contains a breakdown of the selected tickets by lines and date.
These tickets should always add up to the total number of tickets taken.
