Languages & Translations feature allows locations to offer a multilingual check-in flow and make all visitors feel welcome, regardless of their language.
In order to offer a multilingual check-in flow:
- You need to add Languages to your Location and iPad devices
- Use the auto-translate function or manually add translations for Service names, Input fields, Text messages, Visitor website and iPad.
If you already have an old setup with multiple translations added manually, follow the preparation steps in the article “Things to do before using Languages & Translations” before proceeding further
Once you complete these steps, visitors can choose a language before they start checking in on the iPad screen or the Visitor website and continue the check-in flow in their preferred language. All the automated Text messages will also be sent in the visitors' preferred language.
How to add Languages and auto-translations to your location?
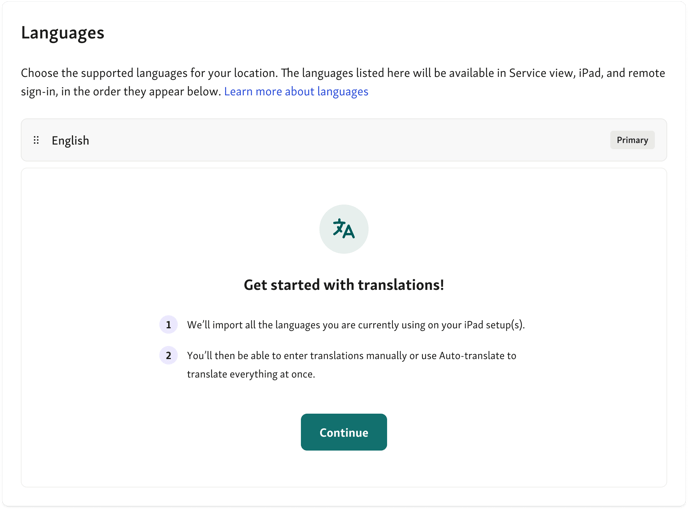
1. To add a new language to your location, go to the Location Settings page and click on Languages from the side menu.
You can always remove Languages along with translations or manually customize and remove some translations from the Location settings pages.

If you're already using languages on the iPad, click the Continue button to sync all available languages from the iPad to your Location settings.
2. Click the + Add Language button from the page and choose the language you wish to add from the drop-down menu.

Added languages will be visible to visitors on the Visitor website page automatically, and on the iPad after configuring iPad Language settings. This allows visitors to choose a language before they start signing in for a service, and continue the check-in flow in their preferred language.
3. After adding a language(s) to your location, the Translation status and option to use Auto-translation will appear.

This view provides information on the translation status of your Location. You can see if:
- – All translations are missing: This is the status of your location before adding any custom translations or using the auto-translation function.
- ⭕ Some translations are missing: Some elements are missing translations. This can be the case when you add a new Service, Input field, or Text message.
- ✔️ Everything is translated: All elements in Services, Input fields, Text messages, Visitor website, and iPad are translated.


The Auto-translation button uses English as the base language and translates all available Service names, Input fields, and Text messages to available languages in your location. It does not override manual translations in non-English languages.
⚠️ To avoid complications, if your location currently uses workarounds—such as combining multiple languages within a single service or Input Field (e.g., English/XX language)—edit these to keep only the English titles before taking the next steps. We recommend saving these translations outside Qminder in case machine-translations are not accurate.
If you don't wish to auto-translate all the Service names, Input fields, or other elements, simply add languages to your location and skip the auto-translation step. You can then manually add translations to any element you choose.
6. The auto-translate button will translate all the available elements in your location such as; Service names, Input fields, Text messages, notes and review texts to the available languages in your location.
Please check all the translations under the corresponding Location settings pages to ensure accuracy.
7. If you are using iPad sign-in, to display Languages & Translations on iPad devices, you need to enable the same languages in iPad settings. Go to Location settings > iPad and select the device you wish to configure.

8. Click on Languages on the left side of your screen, and enable the languages & translations you wish to display on the iPad device. Save and go live.

9. After you complete your setup, check all the translated elements to ensure accuracy. You can see and edit the translations from Location Settings under the Services, Input Fields & Labels, Text messages and Visitor website pages. Click on the element you wish to see the translations or edit.


Contact us if you have any questions or help! Our team is here to help. 💚