How to Set Up a Visitor website
-
Go to the Locations tab in the sidebar.
-
Select the location you want to edit.
-
Click Visitor website in the sidebar menu.

If the location doesn’t have a Visitor website yet, you’ll be guided through the setup process.

Initial setup asks you to choose:
- Site address. Note that you cannot change the URL later.
- Title for the Visitor Website. Suggestion: use a precise name for the location in the title.

Once the Visitor Website is created, it is shown as Active under settings.
Edit your Visitor website
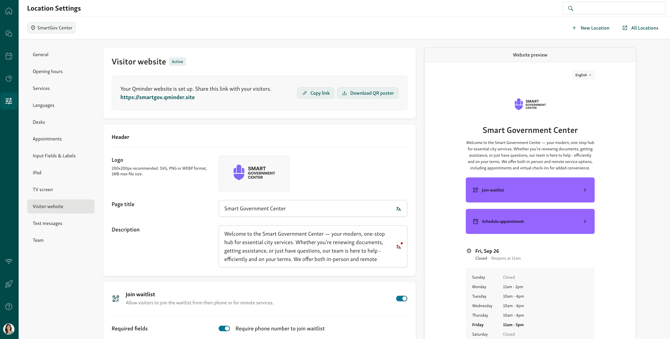
Once your Visitor website is set up, you can customize what visitors see.
In addition to tailoring texts and information you provide to your visitors, you can also adjust visuals.
-
Go to Locations → [Your Location] → Visitor Website.
-
Use the toggles to show or hide sections such as Notes & Tips, Contact Info, or Opening Hours.
-
Update any text fields for title, description, or notes directly from this view.
-
Review the live preview to confirm that everything looks good.
-
Save your changes — updates go live for visitors immediately.
Here’s what you can update/modify:
-
Header

- Logo - You can upload the logo of your organization or department, that will be shown at the top of the Visitor Website. The technical requirements are:
200x200px recommended. SVG, PNG or WEBP format, 1MB max file size. -
Title - The title for your location.
- Page description - Describe your location in your own words
- Logo - You can upload the logo of your organization or department, that will be shown at the top of the Visitor Website. The technical requirements are:
-
Waitlist management options
You can allow visitors to join the waitlist from their phone or for remote services via the Visitor Website. More details are listed under Enable Virtual waitlist below. - Appointments management options

You can allow visitors to schedule and check in for appointments via the Visitor Website. Learn more about enabling Appointments scheduling for your location in our article - How to enable Appointments for your location
🔍 Need step-by-step guidance for check-in options? Check out the article - Set up self-check-in for Appointments - Update Opening Hours

To change opening hours, go to the Location Settings and click the Opening Hours tab. -
Notes & tips

Share important tips (like entrance details or special instructions). -
Contact info

Add your display address, email and phone number. -
Accent color

You can now customize the accent color of your Visitor Website. The accent color will apply to your main action buttons:-
Join waitlist
- Schedule appointment
This allows you to match the look and feel of the Visitor Website to your organization’s branding.
How to Set the Accent Color
1. Go to Settings → Visitor Website → Appearance.
2. Under Accent Color, choose your preferred color.
3. The selected color will instantly update your action buttons for all visitors.
-
💡 Tip: Use your brand’s primary color for consistency and better recognition, or colors with contrast for accessibility.
Live preview
The Visitor Website editor includes a live preview panel so you can see changes as you make them - no need to publish first.

-
Branding updates: When you upload your logo or adjust the accent color, the preview instantly updates.
-
Section visibility: As you switch modules on or off (Notes, Contact info, Opening hours), the preview reflects those changes right away.
-
Language picker: You can also click the language selector in the preview to see how the Visitor Website looks in other available languages. This helps you check translations and make sure the layout works across versions.
-
Content edits: Updates to titles, descriptions, or notes are shown in real time so you can refine wording before saving.
Once you’re satisfied with how the Visitor Website looks in the preview, click Save - your visitors will see the updated version immediately.
Enable Virtual waitlist (Optional)
You can let visitors sign in remotely through the Visitor website. To turn this on:
-
Go to the Visitor website settings.
-
Enable Join Waitlist.
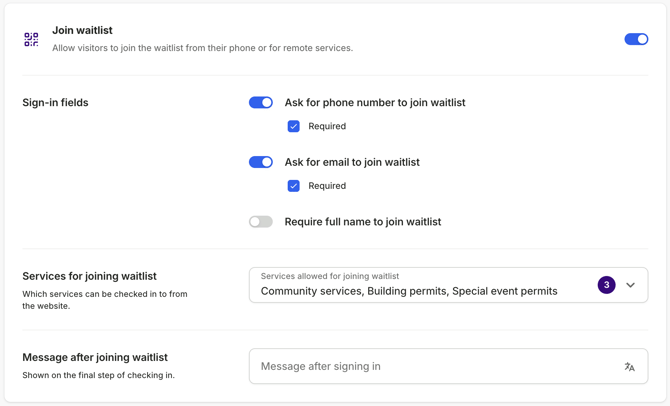
When Join Waitlist is enabled, you can customize:
-
Required fields: choose whether a phone number, email or full name are required to join the waitlist.
-
Geofencing: to restrict sign-ins to visitors near your location, go to Location Settings → Visitor Website → Settings section and enable Must be on-site to join waitlist. The default radius is 200 m (700 ft for US locations) and can be adjusted under Geofence radius.
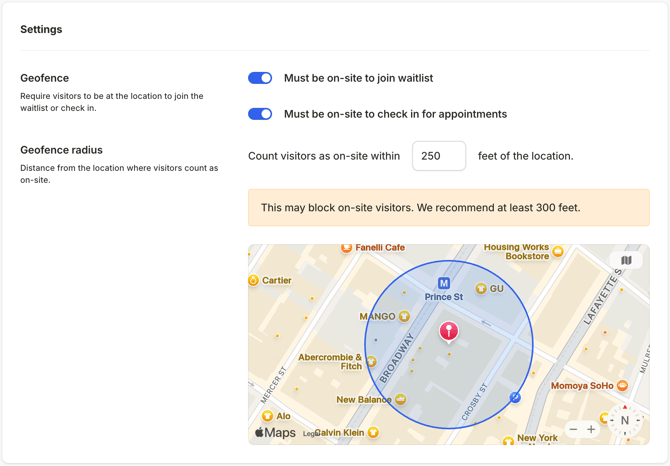
💡 Need more setup help? See our article on Geofencing for details on how location-based sign-in works.
-
Services for joining waitlist: select which services are available to join from the website.
-
Message after joining waitlist: customize the message shown at the end of sign-in.
Visitors can then:
-
Enter their contact details (if required).
-
Select a service line.
-
Join the queue remotely or on-site, depending on your Geofencing setting.
🔍 Need step-by-step guidance? Check out our Virtual Waitlist Flow Guide
NB! The joining waitlist option will only be available during the set opening hours.
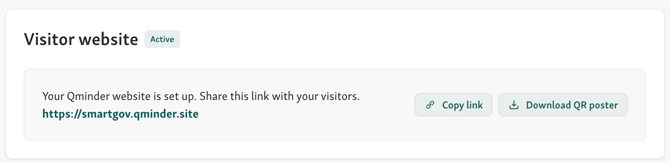
Share Your Visitor website Link
The link to your Visitor website is shown at the top of the customization page.
Once everything looks good, you can share the link:
-
On your company website
-
Via social media
-
In text messages or other direct communications
QR code scanning
A QR code is automatically generated for your location. Scanning the code with your phone will take you directly to the Visitor Website view.


- Click on COPY LINK to get the direct link to the remote sign-in window.
-
Click on DOWNLOAD QR POSTER to download a printable PDF poster that you can place on your location's door or wall so that your visitors can easily scan the QR code
👍 Best Practices
Follow these tips to create a Visitor Website that’s clear, helpful, and trustworthy:
-
Keep it focused: Only show the sections that matter for your visitors.
-
Write clear, short notes: Help visitors prepare for their visit without overwhelming them.
-
Match your branding: Use a logo and accent color that align with your organization’s identity.
-
Test for readability: Make sure button colors have enough contrast and that the text is easy to read on all devices.
-
Review regularly: Keep hours, contact information, and notes up to date.