The remote sign-in option allows your visitors to check in and join the waitlist before they arrive at the facility. Your visitors can add themselves to the queue remotely on our Visitor website without having to come near a crowded waiting room.

Check out our example Visitor website Demo Tartu location.
And CLICK HERE for details on how to create your own Visitor website.
How can visitors join the waitlist remotely?
STEP 1: Visitor signs in remotely
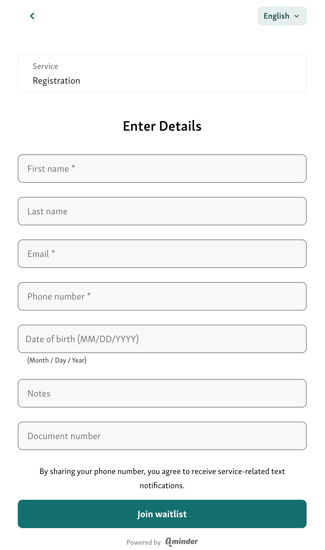
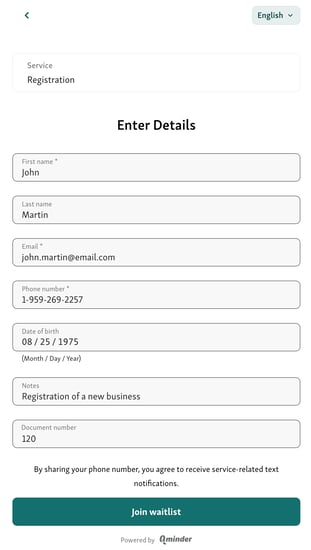
- To begin, the visitor goes to the Visitor website page (via link or QR code scan) which is specifically created for your business. The visitor can pick up JOIN WAITLIST option, which will take the user to the next screen where they can choose the service (NB! In cases where your location provides only one service, this step will be skipped).


- Having chosen the service, the visitor will be guided to the next screen to provide their information. They can type in their name and (optionally) phone number, email address, or any other custom information. Read more about the creation of such input fields in the article "Create and manage Custom Input Fields"
-
Your clerks will see the remotely added visitor in the Service View's wait list. An automatic label called "from website" is added to distinguish the visitor from walk-in sign-ups.


- The Visitor is then taken to the Visit Status page that serves two purposes:
- provides the summary of submitted details, such as service, name, email (if required) and phone number (if required).
- showcases the status of the visit for the user. The visitor can keep this page open in the browser of their device to get the direct update of their Visit Status.

Visit Status page showcases 4 different statuses to the user:
- You are in the waitlist - the visitor has joined the waitlist.
- It's your turn - the visitor has been called for service. The additional information will depend on the location settings. For example, this status can include info on the service clerk: name and number or name of the desk
-
Thank you for visiting - the service has ended.
-
(incl. no-show) Your visit is canceled - the clerk has marked the visitor as a no-show or removed them from the waiting list for other reasons.


STEP 2: Visitors wait for their turn remotely
-
Once the visitor has signed in, they can wait outside, in their car, or anywhere it suits them. This way, they don't have to crowd the waiting area.
- With the Text Messaging features enabled, the visitor will receive a text message informing them that they have successfully been added to the queue. The visitor and clerk can also chat via text messaging if further communication is needed.
- The Visit Status page is accessible to all visitors who joined the waitlist, even if the registration does not require a phone number or email.
STEP 3: Clerk calls the visitor for service
- The clerk calls the visitor in Qminder when it's their turn.
- The Visit Status page will indicate to the visitor that it's their turn.
- With the Text Messaging features enabled, the visitor will receive a text message notifying them of their turn and to which desk or room to go to.

-
Without text messaging, onsite visitors can be informed with Qminder's TV waitlist app or the clerk can simply call out the visitor's name. For remote service, the clerk can call the visitor on their work phone or send them an email.
A remote sign-in option will allow your location to have a virtual waiting line. To set up the remote sign-in option, start with creating a Visitor website.